auth_basic is a lousy protection for your websites. Better use en SSO solution like Authentik. Here is my NGINX reverse proxy host configuration:
server {
server_name HOST.DOMAIN.NAME;
access_log /var/log/nginx/HOST.DOMAIN.NAME.access.log;
error_log /var/log/nginx/HOST.DOMAIN.NAME.error.log;
# Increase buffer size for large headers from Authentik
proxy_buffers 8 16k;
proxy_buffer_size 32k;
# All requests to /outpost.goauthentik.io must be accessible without authentication
location /outpost.goauthentik.io {
# When using the embedded outpost, proxy to Authentik backend
proxy_pass http://AUTHENTIK_IP:9000/outpost.goauthentik.io;
# CRITICAL: Set Host to auth.DOMAIN.NAME so Authentik knows which provider to use
proxy_set_header Host auth.DOMAIN.NAME;
proxy_set_header X-Original-URL $scheme://$http_host$request_uri;
add_header Set-Cookie $auth_cookie;
auth_request_set $auth_cookie $upstream_http_set_cookie;
proxy_pass_request_body off;
proxy_set_header Content-Length "";
}
# Special location for when the /auth endpoint returns a 401
# For domain level, redirect to your authentik server with the full redirect path
location @goauthentik_proxy_signin {
internal;
add_header Set-Cookie $auth_cookie;
# CHANGED: Use full auth.DOMAIN.NAME URL for domain-level auth
return 302 https://auth.DOMAIN.NAME/outpost.goauthentik.io/start?rd=$scheme://$http_host$request_uri;
}
location / {
# -------------------------
# BYPASS AUTH FOR LOCAL IPS
# -------------------------
satisfy any;
allow 192.168.1.0/24;
deny all;
##############################
# authentik-specific config
##############################
auth_request /outpost.goauthentik.io/auth/nginx;
error_page 401 = @goauthentik_proxy_signin;
auth_request_set $auth_cookie $upstream_http_set_cookie;
add_header Set-Cookie $auth_cookie;
# Translate headers from the outposts back to the actual upstream
auth_request_set $authentik_username $upstream_http_x_authentik_username;
auth_request_set $authentik_groups $upstream_http_x_authentik_groups;
auth_request_set $authentik_entitlements $upstream_http_x_authentik_entitlements;
auth_request_set $authentik_email $upstream_http_x_authentik_email;
auth_request_set $authentik_name $upstream_http_x_authentik_name;
auth_request_set $authentik_uid $upstream_http_x_authentik_uid;
proxy_set_header X-authentik-username $authentik_username;
proxy_set_header X-authentik-groups $authentik_groups;
proxy_set_header X-authentik-entitlements $authentik_entitlements;
proxy_set_header X-authentik-email $authentik_email;
proxy_set_header X-authentik-name $authentik_name;
proxy_set_header X-authentik-uid $authentik_uid;
# Your original proxy settings to Homer
proxy_set_header X-Real-IP $remote_addr;
proxy_set_header X-Forwarded-For $proxy_add_x_forwarded_for;
proxy_set_header Host $host;
# Support for websocket
proxy_set_header Upgrade $http_upgrade;
proxy_set_header Connection "upgrade";
proxy_pass http://AUTHENTIK_IP:8090;
}
listen 443 ssl;
ssl_certificate /etc/letsencrypt/live/HOST.DOMAIN.NAME/fullchain.pem;
ssl_certificate_key /etc/letsencrypt/live/HOST.DOMAIN.NAME/privkey.pem;
include /etc/letsencrypt/options-ssl-nginx.conf;
ssl_dhparam /etc/letsencrypt/ssl-dhparams.pem;
}
server {
if ($host = HOST.DOMAIN.NAME) {
return 301 https://$host$request_uri;
}
listen 80;
server_name HOST.DOMAIN.NAME;
return 404;
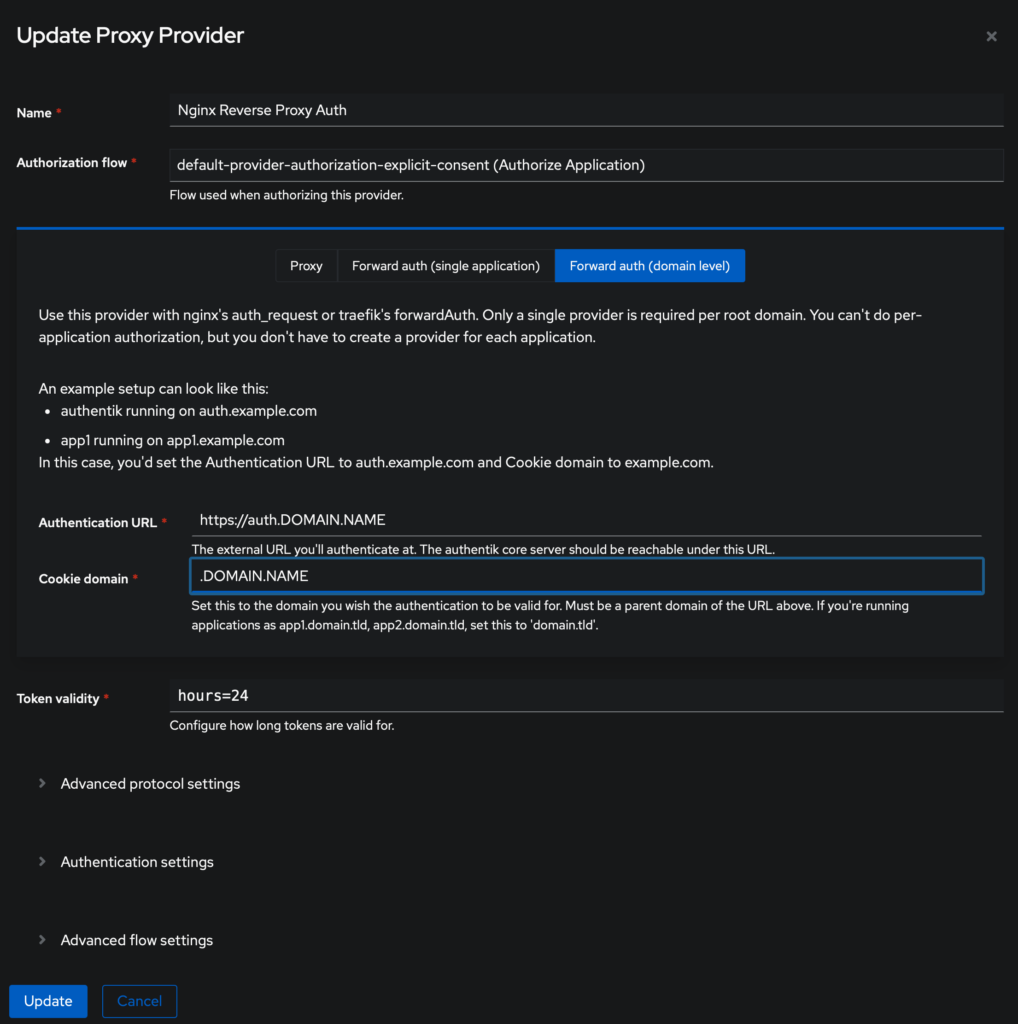
}In Authentik, you have to create a Provider:
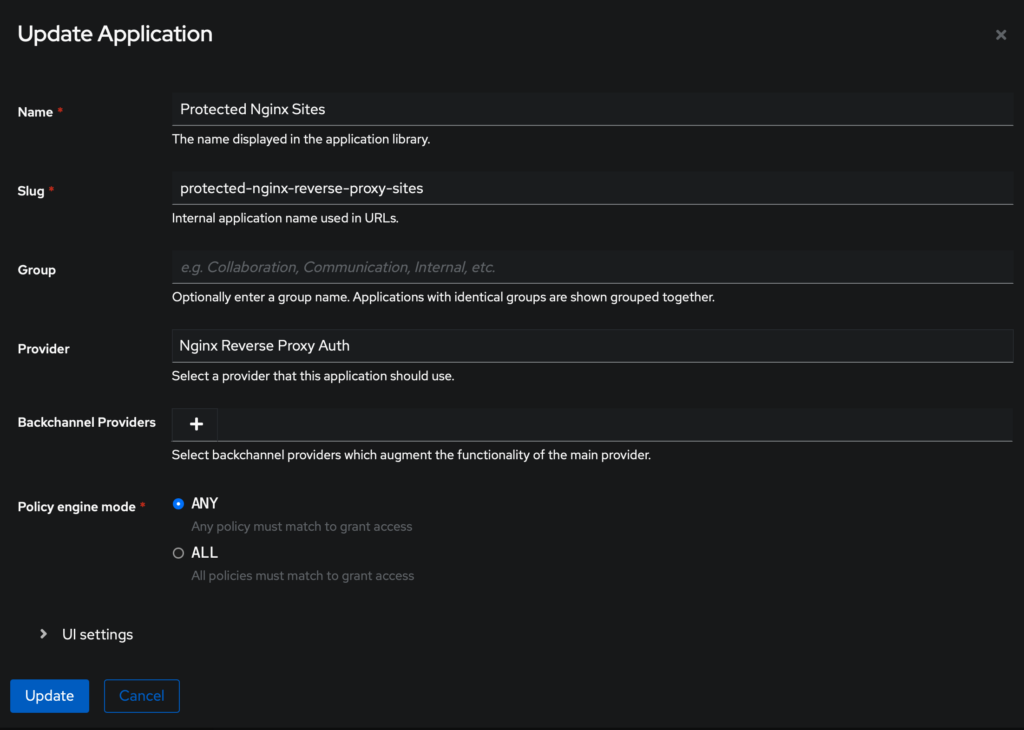
In Authentik, create an Application: