Go to the Connectivity menu, Trunks submenu. Click Add trunk. Add a SIP (chan_pjsip) Trunk.
Define a Trunk Name and an Outbound CallerID.
Define the Dialed Number Manipulation Rules which defines what numbers can be called. Be careful which number structures you allow, as some numbers might become very expensive.
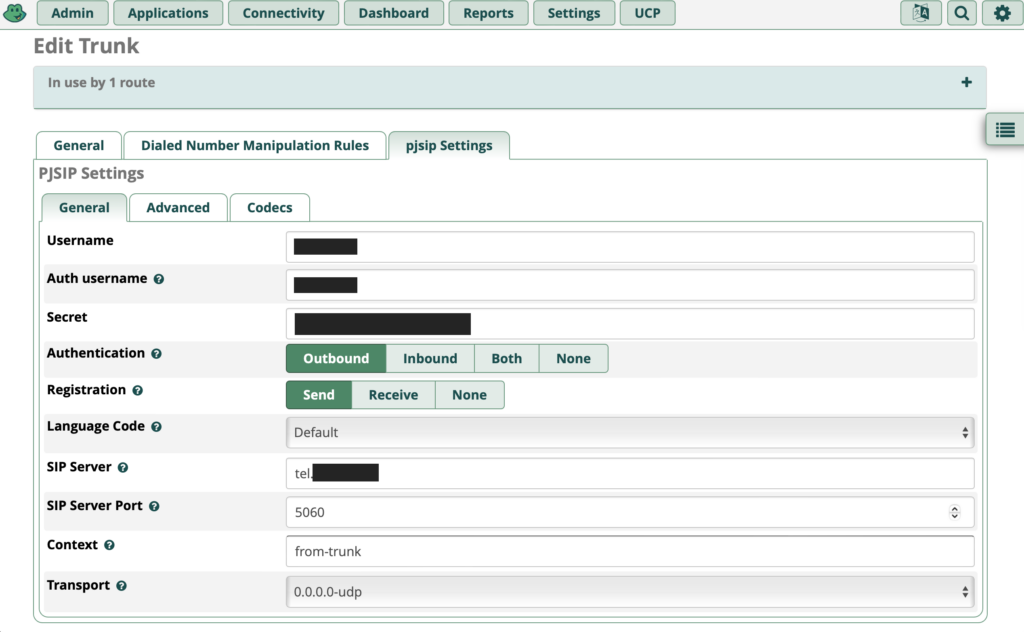
In the pjsip Settings under General, fill out the Username, the Auth username, the Secret and the SIP Server. These information should have been given to you by your VoIP provider. The SIP Server port is mostly 5060. Authentication should be set to Outbound. If your external SIP server has a fixed IP or hostname (and you are on a public dynamic IP), then Registration should be set to Send.

I also filled out the advanced tab information for Contact User, From Domain and From User. Not sure if this is absolutely necessary, but as iI was experimenting a lot to get things going, it is filled out in my case.
When you are done, hit Submit and Apply config.
Configure the SIP settings
Go to the Settings menu, Asterisk SIP settings submenu. Go to the General SIP Settings tab.
For maximum security, disallow Anonymous Inbound SIP calls & SIP Guests.
In the NAT settings, enter your static WAN IP or your dynamic DNS name.
Optional: In the Audio codecs, move the ulaw codec to the top of the list.
Now go to the SIP Settings [chan_pjsip] tab.
udp – 0.0.0.0. – All should be enabled.
0.0.0.0 (udp) Port to Listen On: 5060.
Submit and apply these changes. Restart the Asterisk service using the following command in the Admin menu, Asterisk CLI submenu:
core restart now