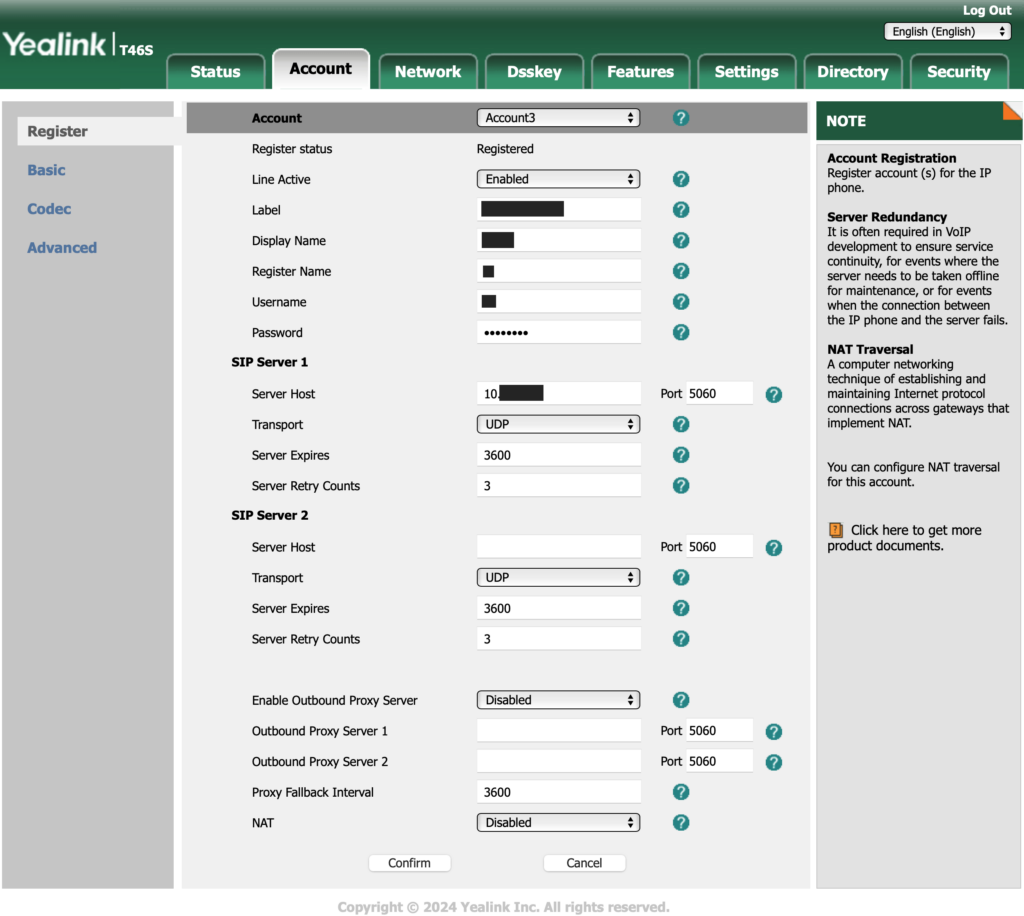
Create the account / line
Open your VoIP phone’s configuration interface. Go to the Accounts tab. Select the next free account and enter the following information:
Line active (enabled), the Label, the Display Name, the Register Name, the Username and Password of your extension, the Server Host (IP address of your FreePBX server), Port 5060 and hit confirm.
If everything went well, the Register Status should be switching from Registering to Registered.

Don’t forget to define a Line Key in the Dsskey tab to make the line visible and usable on your phone. As a Type, use Line, leave the Value on Default, define the Label to show your phone number or whatever you want to see on your phone, and as Line use the account number of the line you created above, in my case: Line 3.
Permit access to Voicemail
To add a voicemail button to your phone, in the Dsskey tab, define a Line Key that has as Type: BLF, as value *97, label it Voice Mail and select your Line as the Line (again for me: Line 3). After hitting the Confirm button, a line key button shows up with a green light (or red, if you already have a message). Of course, this only works if your voicemail is activated for this extension in the FreePBX.
You can also add a button for the general voicemail of your FreePBX system. This mailbox is normally defined ass extension 6000. In this case, the value for the line key has to be *986000. *98 allows to call a voice mailbox of another user. *97 goes to the mailbox of the extension you are using.

Problem solving
If the phone does not register, make sure the entered configuration data is correct and that the firewalls (FreePBX & your router’s firewall, in case you are on a different LAN or VLAN) allow for the connection to happen.
If you want to see the communication between your phone and your FreePBX server, connect with SSH to the FreePBX box and run the following command:
sngrep